
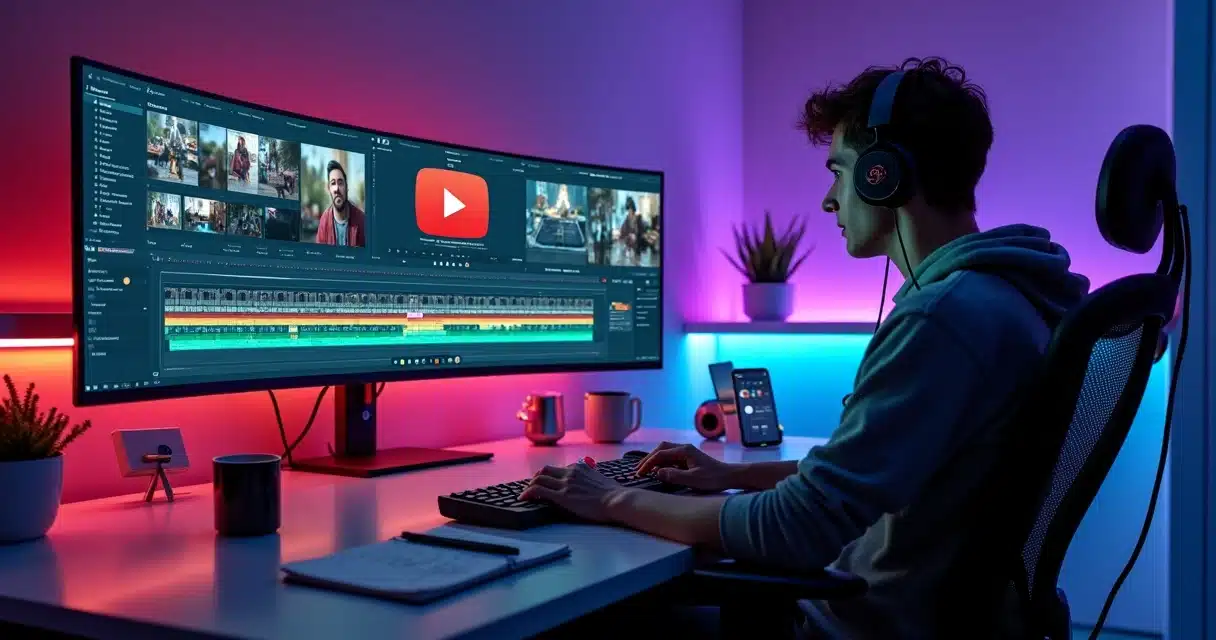
Video editing can transform ordinary content into something unforgettable. In a universe where thousands of uploads happen every day on YouTube, good editing is what separates amateur videos from those that truly capture an audience. The public observes everything: cuts, pacing, sound, transitions. A little more or less can be the deciding factor for a channel’s growth.
A well-edited video captivates. A poorly edited video distracts.
By investing in editing, even those who are just starting discover that it is possible to grow quickly. There are examples of creators who reached 100,000 subscribers in just two years, thanks to a combination of consistent, well-edited videos focused on visual and auditory experience. The secret lies not only in good content but in how it is presented.
Below, we’ve gathered 10 step-by-step tips for editing videos from the start, particularly focused on those who want to grow on YouTube without relying on advanced experience. See how to apply each detail in your productions and notice the difference in engagement from the very first videos.
1. Always record audio and video at the highest quality possible
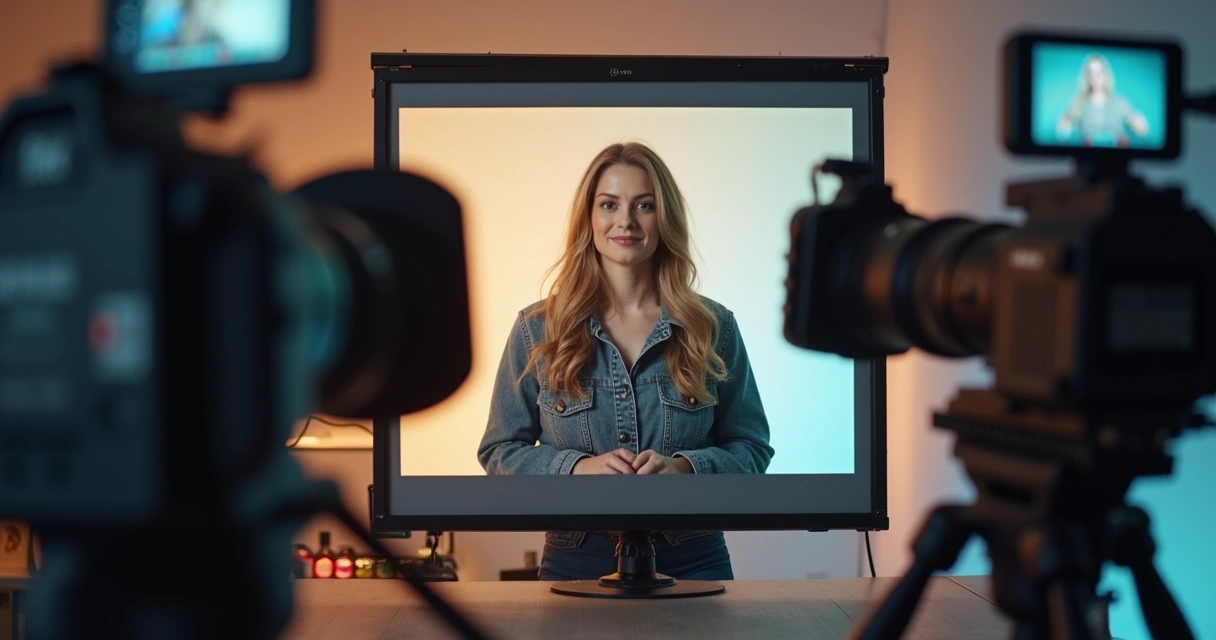
The first step for efficient editing never starts in the software, but rather before: during recording. Good quality audio and video makes all the difference for editing to flow simply and quickly. When the creator starts with deficient files, low audio, noise, or blurred images, correcting them later can be tedious and rarely delivers a professional result.
Imagine a video about technology, for example, where the voice sound is muffled. Any explanation becomes tiresome and gives the impression of carelessness. On the other hand, clean and clear audio, along with sharp images, makes the audience watch with pleasure for longer.
In the production context, platforms like Riverside are mentioned by creators for allowing recording in 4K, high-definition audio, and separate tracks for each participant, making the editor’s life easier. With this approach, editing is enhanced, allowing for detailed cuts and adjustments in individual parts of the project. In other words: recording well is half the battle.
2. Cut ruthlessly everything that doesn’t add value
Many people hesitate to remove parts of the video, but every efficient edit is born from detachment. Cutting out mistakes, noise, long silences, and even repetitions makes the video lighter and removes any sense of “filler content.”
In the manual process, removing all these parts can be time-consuming. But today, text-based editing tools already allow you to work just by deleting words, literally like editing a text in Word. This feature makes the task of adjusting the video’s timing and eliminating unnecessary segments almost instantaneous. The final result is clean and straight to the point – and no one has patience for rambling on YouTube.
This concept of editing focused on essential cuts is so valuable that AI solutions designed exclusively for automatic cuts, like VDClip, stand out. Through AI, it is possible to automatically identify the best moments and eliminate everything that is superfluous. Interested in learning more about how AI can speed up your editing? Check out the article about video editing with artificial intelligence, which explains how this process has been simplified to the extreme.
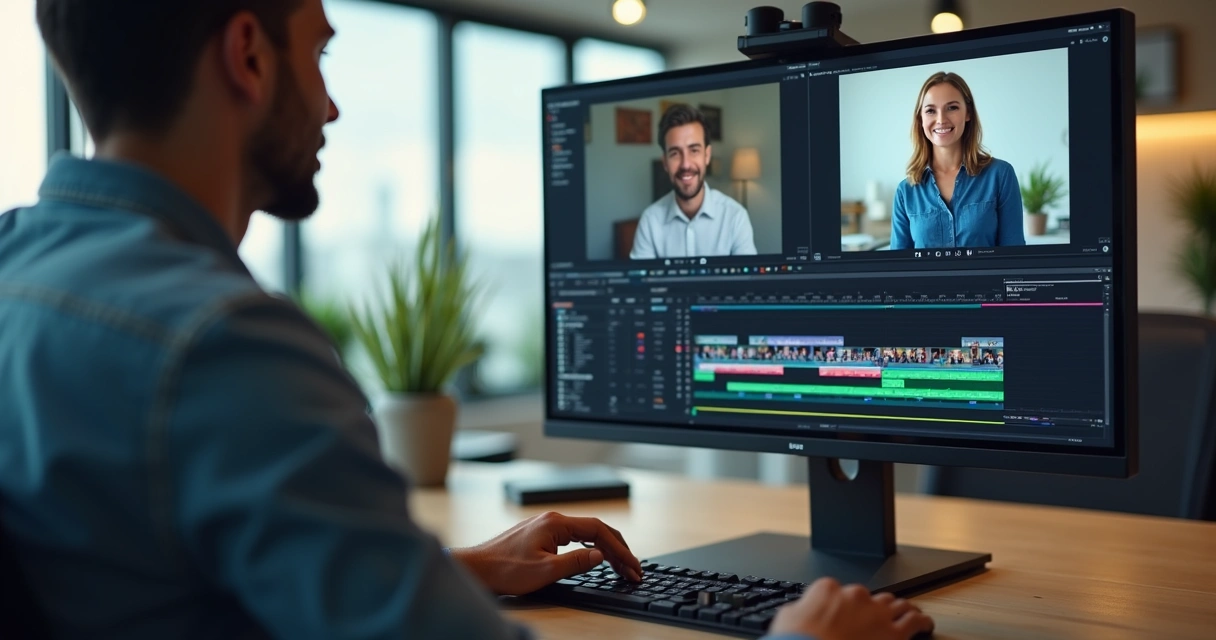
3. Edit audio and video tracks separately
Editing audio and video tracks separately is like working in a big production studio, only at home. This method allows you to isolate unwanted noises, make personalized adjustments to sound intensity, and correct small individual flaws without impacting everything around, which is a differential for podcasts, interviews, and collaborative videos.
Riverside, mentioned by many creators, records each participant on a different track. This enables the editor to improve the host’s sound without affecting the guest’s, correct image synchronization independently, and create smarter cuts. Automation tools like automatic sound adjustment help even more, adjusting volumes to a comfortable standard for the audience’s ears.
Controlling each track individually makes the final product sophisticated and much more comfortable for binge-watching.
4. Give rhythm to the video: neither too fast nor too slow
Nothing distances the audience more quickly than a poorly paced video. If the creator speeds up too much, people tire out. If it takes too long, attention is lost along the way. Here lies the importance of adjusting the rhythm, also called pacing, during editing.
The secret is to cut unnecessary pauses, those long breaths or “speech fillers” like “you know?”, “umm”, among others. Many modern platforms offer automatic functions like “Smooth Speech,” which identifies and eliminates these segments in a way that is almost invisible to the viewer.
The right rhythm makes the video fly by.
To use this feature, simply mark on the timeline the segments to be “smoothed” and let the automation take care of the rest. This way, the result retains naturalness, with a fluid narrative that is comfortable for viewers to watch until the end. The adjustment of pauses, when done well, is almost imperceptible but instantly increases retention.
5. Use cutaways to liven up the presentation
The famous “cutaways” are those quick cuts to a second image or angle that illustrate or reinforce a point. This technique appears frequently in vlogs, product reviews, and interviews, especially when the creator needs to show a reaction, detail, or play with the editing.
Adding cutaways makes the video dynamic and breaks visual monotony. For example: in a laptop review, while the creator speaks, a close-up of the keys, ports, or screen can appear. Just seconds for the viewer to feel they are seeing something more produced.
 These extra takes can be recorded by the creator themselves, received from collaborators, or organized with file management services. The important thing is to alternate without excesses so as not to confuse the viewer. Large channels have grown precisely by knowing how to balance these elements, always keeping the audience’s attention.
6. Trim what’s left: find the message of the video
Every video needs a main message. Before cutting anything, it is essential to discover what the essence of the content is. Differentiate accessory ideas from truly important recordings and prioritize what will add value. By removing repetitions, long explanations, and organizing the video into a continuous flow, the editor builds a visual script that captivates attention from start to finish.
The secret: cut without mercy anything that does not contribute to the objective.
If the cut feels abrupt, use smooth transitions to keep the audience engaged. There is no fixed rule for video length: short and long formats work, depending on how objective the content is. The important thing is not to bore or confuse the viewer.
Those looking for automated solutions for this type of cut can find, for example, the automatic video cutting with AI from VDClip, a way to identify segments that have more engagement potential, ready to go viral. This makes a difference for both experienced YouTubers and those just starting out.
7. Add subtitles to your videos: accessibility and retention
Adding subtitles has ceased to be a “detail” and has become a requirement for those who want to grow on YouTube. Subtitles expand the audience, making the content accessible to people with hearing impairments, foreign audiences, and even those in noisy environments.
Automatic transcription tools greatly speed up the process: just upload the video, extract the transcription, review terms, and adjust the visual appearance of the text according to the channel’s identity. The feature of searching for specific words in the subtitles further improves accuracy: if you find a transcription error, it’s easy to edit just that segment without having to re-record everything.
 If you are looking for ease in creating subtitles, platforms like VDClip offer automatic generation, review, translation, and customization, even for various languages, which facilitates reaching global audiences. Learn more in the guide transforming long videos into optimized subtitled content with artificial intelligence.
8. Vary angles and shots for more engaging videos
Adding different angles and types of shots makes the video less monotonous and highlights key moments. The simple use of a cellphone as a second camera already provides cuts that increase the energy of the video at strategic points.
 The tip is to use these resources in moderation: excessive angle changes can confuse the viewer. Use cuts to mark topic changes, reinforce ideas, or illustrate an important point. Modern platforms even integrate the recording of multiple devices in real time, enabling the smart merging of images during editing with just a few clicks.
9. Sound effects and tracks: emotion, rhythm, and professionalism
Sound can completely change the perception of a video. Well-placed sound effects, whether a notification beep, a beat to emphasize a word, or soft background music, create a different atmosphere for the audience. Tracks help provide rhythm and guide the viewer’s feelings.
To organize these elements, the “Media Board” allows you to load and play soundtracks, intros, live audio effects, optimizing time and keeping the result clean, without unpleasant surprises.
Well-applied effects increase the perceived value of the channel, keeping the viewer immersed until the end. The choice of sounds should be strategic, always considering the desired emotion for each segment. Inappropriate music and off-context effects can distract attention, so it’s worth reviewing carefully before upload.
With artificial intelligence, platforms like VDClip can even suggest tracks, import sounds from libraries, and synchronize everything with subtitles and autonomous cuts. This elevates the experience to the professional standard desired by those looking to grow on YouTube.
10. Smooth transitions and consistent visual identity
Transitions play an important visual and auditory role: they maintain the flow between themes, scenes, blocks, and ideas. The main types of transitions are fades (smooth appearance/disappearance), crossfades (mixing audio or image while moving from one scene to another), and wipes (passing one image “pushing” another).
Even before you start recording, it’s ideal to have intros and other brand elements, like credits or end screens, already loaded in the system to be used whenever needed. This way, you can insert effects quickly without wasting time searching for specific files.
To create crossfades, position the two clips side by side and select the desired transition. Adjust the duration to ensure that the audio doesn’t overlap or become abrupt. The command is simple: drag the effect and preview the result. If you need to refine, decrease or increase the time until the transition feels natural.
Well-made transitions keep the audience in the video, without noticing the changes.
Gold tips: how not to err in editing for YouTube
After the 10 main tips, it’s worth reinforcing extra points for the good editor:
- Always focus on the narrative: think about what the audience will feel at each moment;
- Use YouTube audience data to adjust styles, cuts, and video frequency;
- Review the video with a “rested eye” before publishing; a break of a few hours reveals errors that go unnoticed;
- Keep files organized, with clear names and folders by project;
- Avoid excessive visual effects, transitions, or music, at the risk of losing focus;
- Prefer tracks and effects compatible with the mood of the video;
- Save backups of the original files and final edits to avoid losing anything important;
- Never leave the video with rough cuts, shaky images, or without a pleasant visual flow.
By experimenting with each of these tips while recording different subjects, testing unexpected angles, changing tracks, or exploring formats, evolution happens naturally. If the goal is to create short videos for social media, making cuts easier, scheduling posts, and automating the process, using solutions like VDClip can further enhance your productivity effortlessly. Transforming long videos into viral-ready clips has never been faster.
Common editing mistakes that can be easily avoided
The inexperienced creator often errs due to carelessness or overconfidence, but most mistakes can be avoided without extensive technical knowledge:
- Using copyrighted music without a license can lead to strikes and even shut down the entire channel;
- Publishing videos without checking sound quality, which is one of the primary causes of abandonment;
- Not investing in good video and audio recording from the start;
- Leaving abrupt cuts and shaky images;
- Ignoring subtitles and translation details;
- Not reviewing transitions between blocks, which can cause strange jumps;
- Disorganization of files and folders, making last-minute changes difficult;
- Not experimenting with automatic features that facilitate cutting and editing.
By avoiding these pitfalls early on in the first videos, the journey becomes enjoyable from the start, setting the channel on a path of consistent growth.
Transforming videos with convenience: the help of AI and VDClip
With constant practice, each recording gets better. Testing different environments, lighting, routines, and formats is where the real evolution of a YouTube video editor lies. But for those who want to speed up the process, achieve consistency on social media, and ensure videos ready to go viral, automated solutions like VDClip are gaining space and trust within the community.
VDClip simplifies manual tasks, from smart cutting to subtitle generation, effect insertion, track synchronization, hashtag selection, and optimized title suggestions. All of this combined with an interface that helps those who have never edited before and saves time for those who have been editing for years.
If the interest is professional production, but without the slow learning curve, VDClip is the right alternative for those who want to publish more, engage more, and gain new followers from the beginning of the channel. It’s worth trying and feeling the difference in each video.
Conclusion: Always practice and automate what you can
Video editing is not a gift reserved for a few; it is a set of techniques refined through practice and attention to detail. Those who apply the right tips and experiment with modern solutions find that reach, consistency, and audience grow at an accelerated pace. Avoiding basic mistakes, seeking automation, and keeping the channel true to the audience and purpose makes all the difference.
Ready to take the next step? Get to know VDClip better and test editing and smart cutting features to speed up your journey towards success on YouTube. Your audience will feel the difference right from the first productions!
Frequently Asked Questions about video editing for YouTube
How to start editing videos for YouTube?
The first step is to define your message, record with good audio and video quality, and choose a simple editing tool. After capturing the content, cut unnecessary parts, add subtitles, and insert soundtracks to maintain attention. With practice, it becomes natural to identify what needs to be kept or removed. Platforms like VDClip help a lot at this beginning, providing very accessible automated tools to accelerate the editing process.
What free programs can I use to edit?
Among free programs, there are several basic options on the market, but many beginners seek tools with AI features, templates, and social media integration. The most important thing is to choose an intuitive editor that allows you to cut, insert subtitles, and export videos in formats suitable for YouTube. With VDClip, you can make automatic cuts, clips for shorts, and much more, even without prior experience, which is a very interesting option for those starting out.
How to choose music for YouTube videos?
The ideal is to always use royalty-free soundtracks or those acquired from official libraries. Prefer music that matches the mood of the video, adjusting the volume so it does not overpower your voice. Sound effects help a lot, as long as they are used sparingly. Also, remember to give proper credit when necessary and review all points of the video to avoid notifications or blocks from YouTube.
Does video editing help gain subscribers?
Yes! A well-edited video conveys professionalism, retains the audience for longer, and facilitates sharing. By investing in precise cuts, subtitles, smooth transitions, and engaging narratives, the channel keeps the audience engaged and increases the chances of viewers subscribing and recommending the content to friends. Tools like VDClip make this process faster, allowing for scalable production even for individual channels.
How to make my video more interesting?
Interleave different angles, use cutaways to reinforce important points, add soundtracks and specific sound effects, and adjust the rhythm without pauses or repetitions. Subtitles and transitions also enhance understanding and make the visual flow more pleasant. Experimentation is key: test new formats, edit with attention to narrative, and always seek to innovate, tracking results through audience feedback.